We discussed before in details how to build Azure Functions using Visual Studio 2017 and VSCode (review my previous articles Building Azure Functions in Visual Studio Code using .Net Core and Building Azure Functions in Azure Portal & Visual Studio 2017 using .NET Core). Today we’re going to benefit from this knowledge to create a blob trigger function app in azure using Visual Studio 2019 (you can also use Visual Studio 2017 to apply all the steps and features discussed in this post) where this function will be triggered upon an image upload to a blob storage where after we will analyze this image using azure cognitive services and save the analysis results into a ComosDB.
This post assumes that you already have an Azure account and ready to be used, in addition to Visual Studio 2019 installed on your machine. If not you can create your own free trial account by subscribing to Azure portal.
Creating a Blob Trigger Function
Before creating the blob trigger function in Visual Studio, make sure you have set up a blob storage account in Azure (for help you can refer to Microsoft docs Create a storage account). Back to Visual Studio, we want to create a function that trigger whenever a new image is uploaded into a blob storage account. To achieve this, there is a template in Visual Studio 2019 that helps with this as shown below.
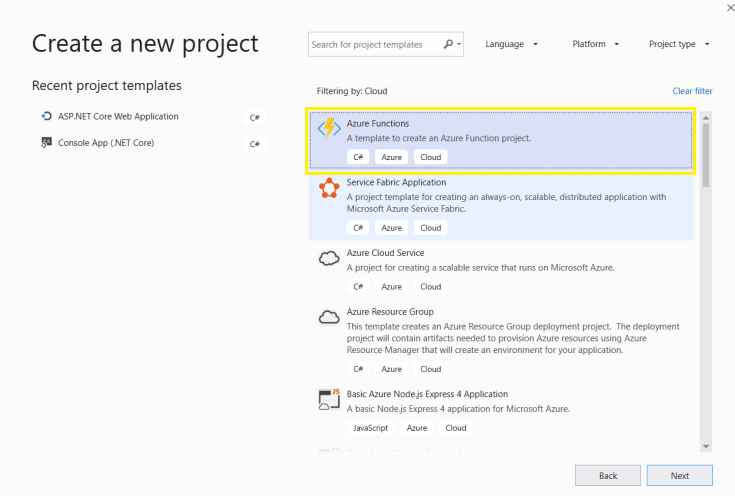
Choose the Azure Function project template after filtering by project type Cloud. Then we have to specify the project name and location after that.

when we click create, a new form will show up to select the type of the function to be created. We’re creating a blob trigger function, so we will choose the “Blob Trigger” template option. After choosing this option with target framework as .Net Core, we have to specify which storage account to use and what is the path under this account.
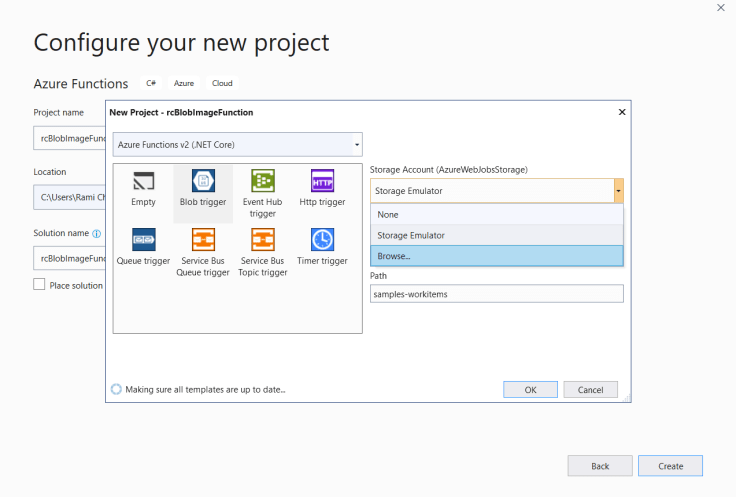
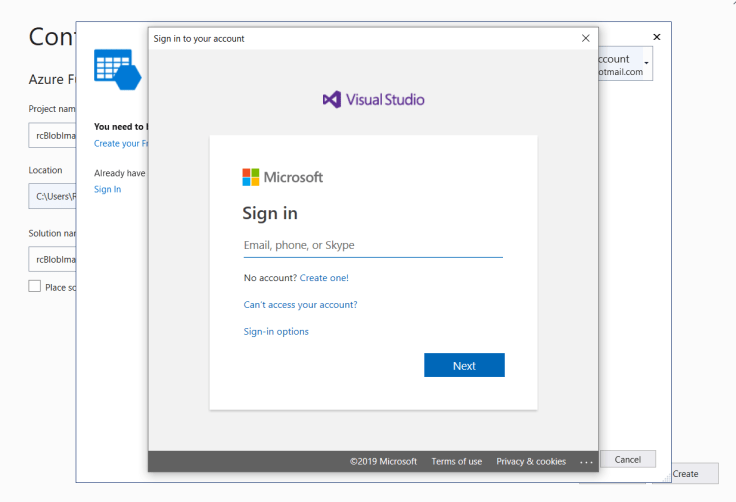
Visual Studio 2019 provides the option to specify a Storage Emulator as a storage account. This helps in simulating most of the features of Azure storage account locally on your machine (for help about storage emulator and how to use it, you can refer to Microsoft docs Azure storage emulator). But this option is limited, so we will be using our created storage account that exists on our azure subscription. When we select Browse as shown above, you will be asked to sign in to your Azure account so that the available storage accounts in your subscription can be shown to choose from them. Follow the steps as below.
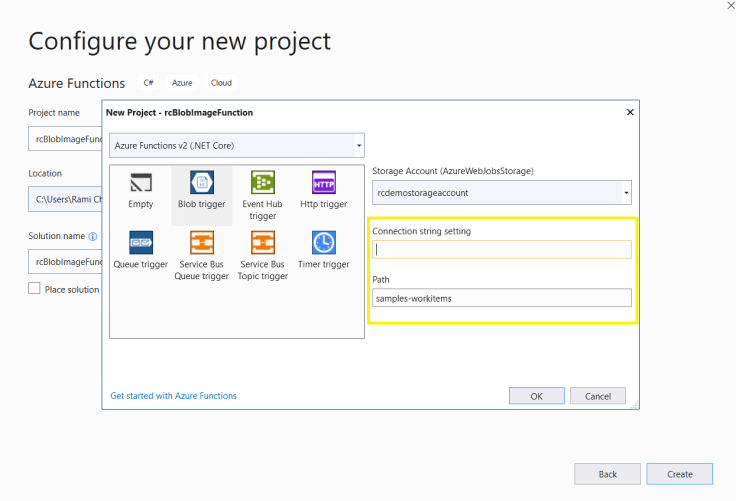
After signing in, a list of available storage accounts per selected subscription will be shown. Select from the list the storage account created for this solution and click Add. You will be returned back to the form where templates are listed, but this time you will see the selected storage account and asked for the connection string and the path where the images are uploaded or saved in this blob.
To get the connection string correctly, we have to go to the portal and browse for the selected storage account. When the storage account blade shows up, navigate to the Access keys section under settings. Another blade will appear that contains several keys to be used. One of these keys is the connection string value to be used to reach out this storage account.

Now you have the connection string value provided to the project template, we still only have the path. Simply, the path or container will be “images” since we’re uploading images to this blob. You can choose whatever path you find it suitable. After clicking “Ok”, the project template will be created and you will have something similar to the figure shown below.

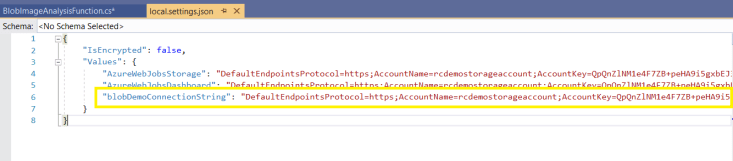
We will do some modifications before we start developing the function. First, we will rename the function so that it reflects what we’re doing. I chose to name it “BlobImageAnalysisFunction”. Second, we will remove the long connection string value from the function attributes, and add it to the local.settings.json file so that the connection string value can be loaded from there. I chose to name the connection string key as “blobDemoConnectionString” and set the value in the settings json file. These changes are shown below.
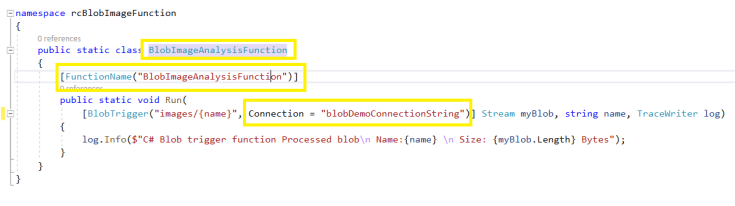
As you can see in the figures above, the function takes several parameters. The first one is represented with the BlobTrigger attribute which requires also two parameters, the path parameter that is formed up of the path or container name in the blob that the images will be uploaded to and I want Azure to monitor it for any newly uploaded images, and the connection string name attribute which we set while creating the project template and moved it to the configuration file. The path parameter in the Blobtrigegr attribute has the /{name} which is similar how routes are defined in ASP Net Core. The /{name} which is a parameter in between curly braces indicates that the function will take the name of the blob being used as an input parameter. Next we have the actual input parameter which is the Stream with myBlob variable name. When a new blob is defined in the images container, the Azure function can automatically open that blob to me and pass all the needed information in a form of Stream. The next variable or input parameter to the function is the blob name in form of string format and finally we have the TraceWriter for logging purposes.
Based on what Microsoft docs suggests here Azure Blob storage bindings for Azure Functions, we can also use the CloudBlockBlob in the namespace Microsoft.WindowsAzure.Storage.Blob instead of Stream where you can reference it from NuGet packages in your project. Notice that after changing the Stream parameter into CloudBlockBlob, you should do some changes in the first line of code in the function body responsible for logging the needed information to tell that this function is working properly. So, you can use myBlob.Name instead of the name parameter in the function signature, and change also myBlob.Length to myBlob.Properties.Length where the properties offer also many attributes that are useful. All what we changed and talked about are reflected in the figure below.

Since the blob we’re working with lives in a private container, this means that we need permission to access this blob or in turn may pass this access to other functions or components. This can be achieved through what we call Shared Access Signature and you can refer to Using shared access signatures (SAS) to learn more about this concept, including different types of SAS and how to create SAS in C#. So, we will create a small simple method that creates a SAS for us in order to access this blob, and I’m not doing something new here, the sample code below for creating SAS value was done by the aid of the mentioned Microsoft docs reference above.
public static string GetBlobSharedAccessSignature(CloudBlockBlob cloudBlockBlob)
{
    string sasContainerToken;

    SharedAccessBlobPolicy sharedPolicy = new SharedAccessBlobPolicy()
    {
        SharedAccessStartTime = DateTime.UtcNow.AddHours(1),
        SharedAccessExpiryTime = DateTime.UtcNow.AddHours(1),
        Permissions = SharedAccessBlobPermissions.Read
    };

    sasContainerToken = cloudBlockBlob.GetSharedAccessSignature(sharedPolicy);
    return sasContainerToken;
}
The above method takes my currently accessed blob as an input parameter and in the method body we’re specifying the permissions on this blob which is only Read in our case since we’re reading uploaded images to the blob. We’re also setting the start time and expiry time access which is in my case a maximum of one hour needed to finish this demo. Finally the SAS is generated by the blob itself and we’re returning back the token as a result for this action.
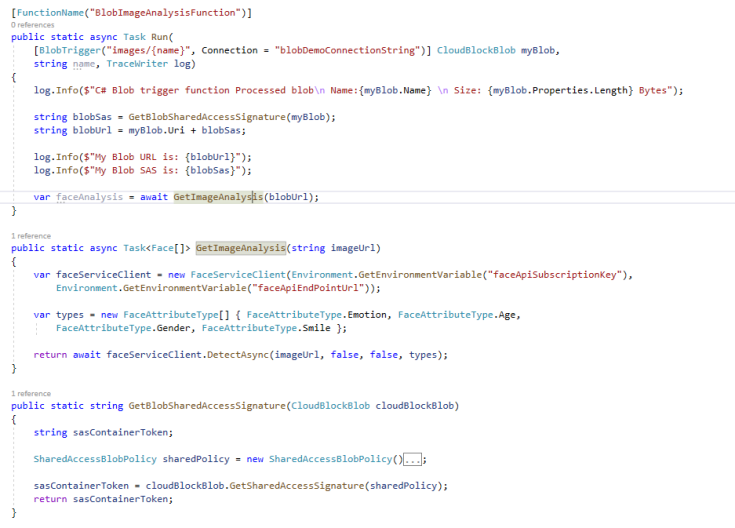
So now in our blob trigger function we will write some code that shows up some blob information and try to invoke the GetBlobSharedAccessSignature method in order to generate the SAS token in addition to the URL to this blob. We will log all these info to make sure that our function is working well. The modified code is as follows.
public static class BlobImageAnalysisFunction
{
    [FunctionName("BlobImageAnalysisFunction")]
    public static void Run(
        [BlobTrigger("images/{name}", Connection = "blobDemoConnectionString")] CloudBlockBlob myBlob,
        string name, TraceWriter log)
    {
        log.Info($"C# Blob trigger function Processed blob\n Name:{myBlob.Name} \n Size: {myBlob.Properties.Length} Bytes");

        string blobSas = GetBlobSharedAccessSignature(myBlob);
        string blobUrl = myBlob.Uri + blobSas;

        log.Info($"My Blob URL is: {blobUrl}");
        log.Info($"My Blob SAS is: {blobSas}");
    }

    public static string GetBlobSharedAccessSignature(CloudBlockBlob cloudBlockBlob)
    {
        string sasContainerToken;

        SharedAccessBlobPolicy sharedPolicy = new SharedAccessBlobPolicy()
        {
            SharedAccessStartTime = DateTime.UtcNow.AddHours(1),
            SharedAccessExpiryTime = DateTime.UtcNow.AddHours(1),
            Permissions = SharedAccessBlobPermissions.Read
        };

        sasContainerToken = cloudBlockBlob.GetSharedAccessSignature(sharedPolicy);
        return sasContainerToken;
    }
}
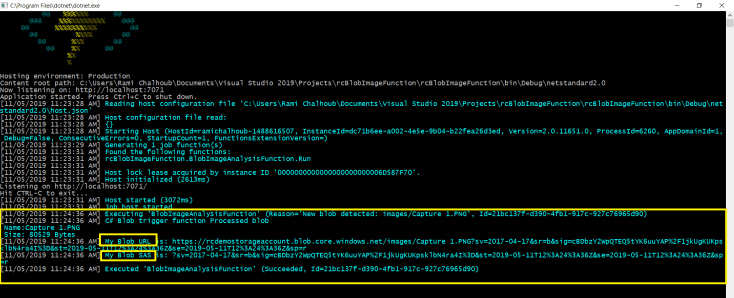
What we did is only generating the SAS token value, appending it to the blob URI to generate the blob URL and logging these information to make sure that our blob is working. Try now to run the project, then go the blob and upload a new image, you will see that your function will be triggered and the logged values will be shown up on the screen. When doing so, you should have an output similar to the below.
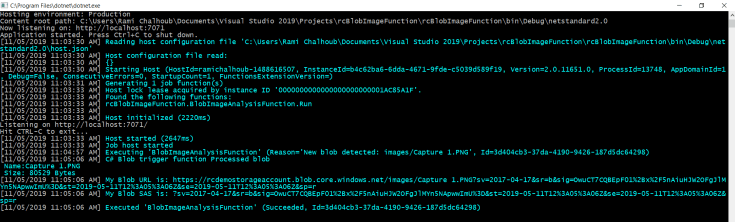

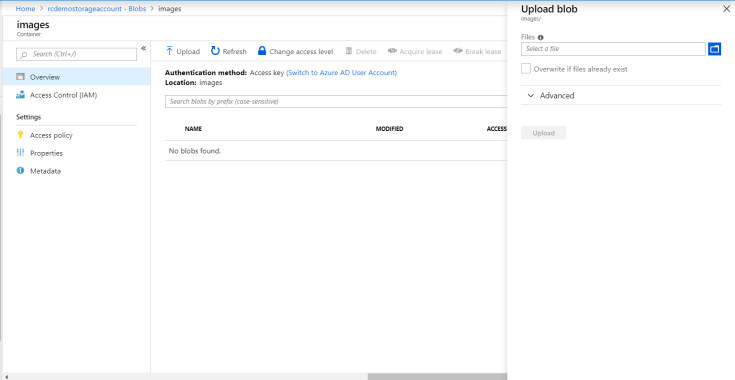
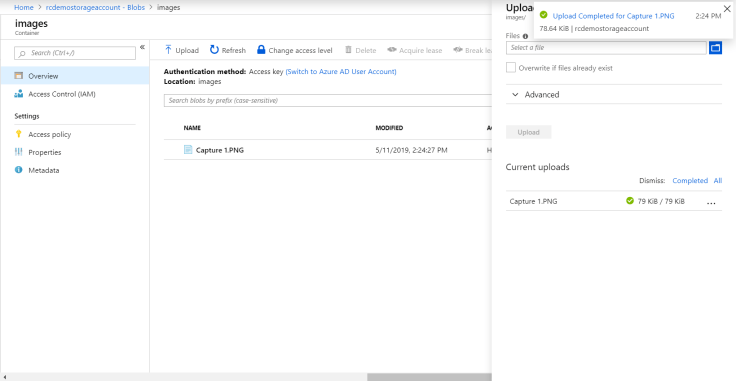
When uploading a new image to the blob from Azure portal, your function output will be something similar to the below.
Now we have created our function and tested it successfully, we move to the next part which is setting up the Face API that we will use to analyze our uploaded image.
Creating a Face API Cognitive Service
Azure platform provides an intelligence framework in form of Artificial Intelligence services, Machine Learning services, and Cognitive Services. Azure Cognitive Services are in fact web services that you deal with in order to do some analysis. These services include visual things that image processing is a part off, natural language processing, speech to text conversion, etc… You can find a list of all provided services in this reference Azure Cognitive Services
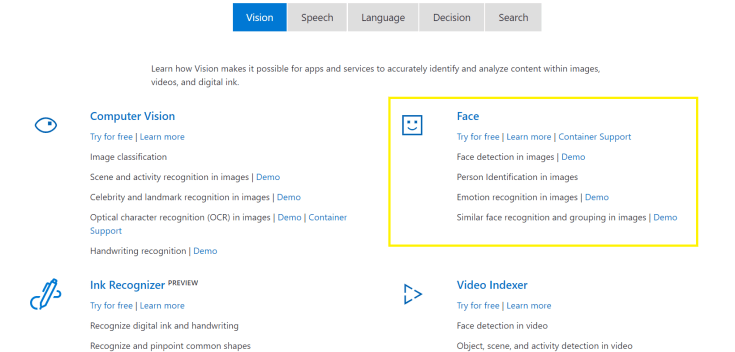
Since our demo is to analyze an uploaded image to a blob, what we need is the visual cognitive services and in specific the Face API. There are several services offered by the visual cognitive services bundle, one of them is useful to be used here also which is the Video Indexer API, so you can try to mimic the same demo based on this service but for video files and not images.
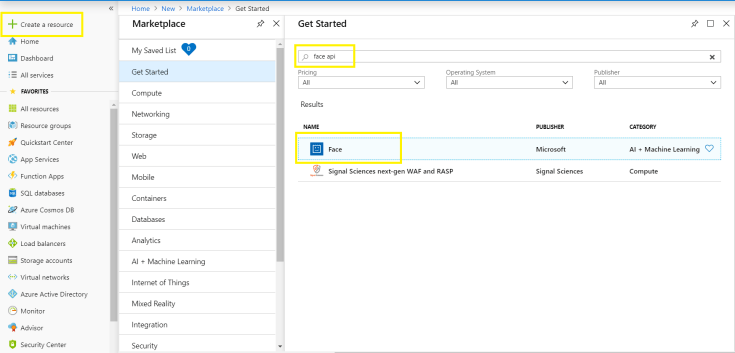
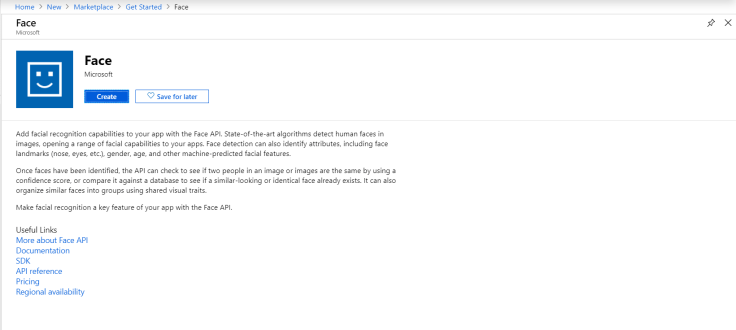
So now we go the Azure portal in order to create the Face API service. Navigate to “Create a resource” blade and search for Face, you will have something like below in the search result. After that click on Face (AI + Machine Learning), a blade with title Face shows up which asks for creating your new Face API. Follow the below screens for creation instructions.

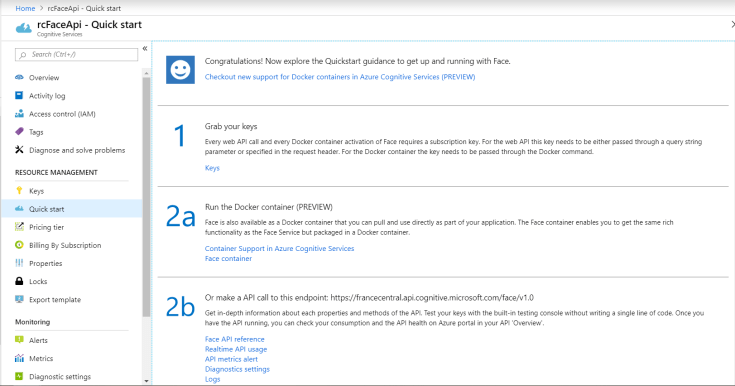
After providing the name of the API to be created, I chose the free pricing tier since we’re doing a small demo here. Of course if you’re using this Face API for production purposes or real scenario, the free pricing tier isn’t enough since it have a limited number of calls. When the Face API is created successfully you will be navigated to a blade similar to the below (since Azure is being updated in a fast manner, your blade may be different from what you’re seeing below).
As we mentioned before, the Azure Cognitive Services are web services that provide intelligent functionalities for your data and image processing. These functionalities in reality are exposed in the form of a Web APIs. This means that I can reach any functionality through the invoke of an HTTP endpoint, post some data and get back the results from the API in JSON format. Since these services are in the form of Web API, then in order to go through my demo, I must have an HTTP Client that can invoke the Face API by providing it with the uploaded image URL that already contains the SAS token, and take the results of the analysis which will be posted later to a CosmosDB. We can achieve this by referencing the Face API client library into my project from NuGet packages. The library name is Microsoft.ProjectOxford.Face.DotNetStandard and I’m referencing the Dot Net Standard version since my project is .Net Core base.
Next we’re going to write a method that invoke the Face API image processing service asynchronously which returns a Face array since the uploaded image may contain more than one person, and accepts the image URL as a parameter where the URL contains the SAS generated token mentioned before. The method is shown below.
public static async Task<face[]> GetImageAnalysis(string imageUrl)
{
    var faceServiceClient = new FaceServiceClient(
        Environment.GetEnvironmentVariable("faceApiSubscriptionKey"),
        Environment.GetEnvironmentVariable("faceApiEndPointUrl"));

    var types = new FaceAttributeType[] { FaceAttributeType.Emotion,
        FaceAttributeType.Age, FaceAttributeType.Gender,
        FaceAttributeType.Smile };

    return await faceServiceClient.DetectAsync(imageUrl, false,
                                               false, types);
}</face[]>
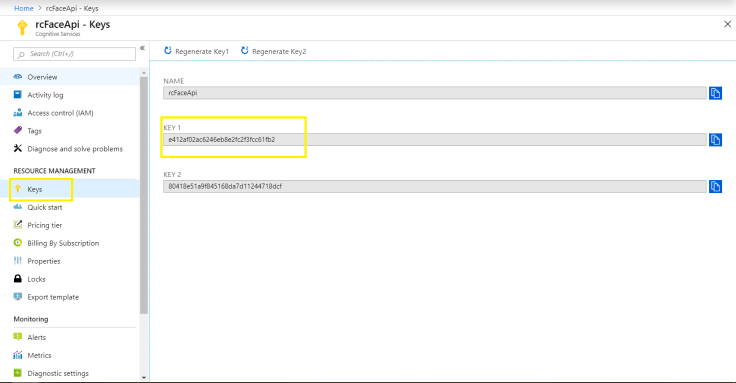
To explain this method, we start from the first line where we initialized the FaceServiceClient to invoke the Face API. The FaceServiceClient takes two parameters, the subscription key value, and the API end point. I saved these values in the local.settings.json and this is the way to get the values of these variables from the configuration file. Of course you’re wondering what are these variables and where to get them from. The first parameter is the key needed to access the Face API we created in Azure and it’s an entry key for granting access to the API. The second parameter is the URL that the Face API can be invoked through. You can get these values from the Keys section and the Overview section in the created Face API in Azure. Check below figures to have a clear view.

The next line of code is to specify what are the face attributes types to be included in the analysis of the image. This takes places by initializing an IEnumerable list (or new[]) of FaceAttributeType where for my demo I included the Emotions, Age, Gender, and Smile. The last line is to call the method responsible for detecting the image based on the attribute types specified and return back the results. Notice that the call of the detect method is async so we have to await and since we’re using it the in the body of the Run function, we have to change the Run function to be async Task. The modifications are shown below. Next we’re going to set up the CosmosDB to save our image analysis results in it and upload the blob trigger function to our Azure portal for testing.
Saving Image Analysis to CosmosDB
Our target is to analyze an uploaded image via Azure Cognitive Services and specifically through Face API and then save the analysis results to CosmosDB. All that to be done through the blob trigger function to be hosted on our Azure portal. So, now the missing part is the CosmosDB. I will not be giving a step by step guide here to create a CosmosDB in Azure and for more details you can refer to this documentation for further help Azure Cosmos DB Documentation. I already created a CosmosDB in my Azure portal where this database contains a collection named images in order to save the analysis information into it. Below is what my ComosDB looks like.

Now that we have our CosmosDB ready in Azure, we need to modify our blob trigger function to save the analysis results after calling the Face API into the images collection in this database. In order to do so, we have to add the suitable NuGet package to access the CosmosDB. Microsoft.Azure.WebJobs.Extensions.CosmosDB is the needed package to be installed in order to access our CosmosDB and images collection.
A very important note here, when you install the CosmosDB package, you may have some conflicts with the packages already installed in your project. One of the problems you may face is that BlobTrigger attribute will not be recognized anymore, this is because the latest stable version of WebJobs.Extensions.CosmosDB uses also the latest version of the Microsoft.NET.Sdk.Functions where you will be forced to update this package and at the end install Microsoft.Azure.WebJobs.Extensions.Storage in order BlobTrigger to be recognized again.
As you can see in the figure above, my CosmosDB account name is “rcimagesdemodb” and the collection to hold the analysis results name is “images”. Note that the images collection is found in a container named “rcBlobImageDB”. From the data explorer section you can fetch out and query the data found in this collection.
To push analysis information into our CosmosDB, we have to modify our function to accept an output binding to the database. Moreover, we need to hold our analysis data in an object that can be used to track and push the data into the collection. For this purpose we will create a simple class that holds up the blob name and the collection of faces that were analyzed by the Face API.
[CosmosDB("rcBlobImageDB", "images", ConnectionStringSetting = "cosmosDBConnectionString")]
IAsyncCollector<FaceAnalysis> analysisResults
The upper piece of code should be added to the function Run signature as an output binding, where this will give us the ability to access our CosmosDB images collection. Several things to be mentioned here to clear what this code does. First the CosmosDB attribute takes several parameters. The database name which is “rcBlobImageDB” in our case, the collection name which is “images” and several properties which we use only one of them now that is the connection string to access the CosmosDB. As known with all resources in Azure, the connection string can be fetched out from the Keys blade inside the CosmosDB account you’ve created. I added also the connection string as a key inside the local.settings.json with a key name “cosmosDBConnectionString” and the value is the one fetched out from the Azure portal. After adding this binding to the function, we need to define the collection to hold up our analysis data. I chose to use the variable type IAsyncCollector. What I do here with IAsyncCollector is keep adding objects this collection and when the blob trigger function executes successfully, the collection in this object will be then pushed to the CosmosDB images collection based on the attributes provided from database name, to collection name, and the proper connection string.
The class I created named FaceAnalysis is a simple class with public access that only contains two properties, the blob name property and the faces collection property.
public class FaceAnalysis
{
    public string BlobName { get; set; }

    public Face[] Faces { get; set; }
}
Now we have the output binding to the CosmosDB, and we have the object class that will hold our data to be pushed to the images collection, we have to modify our function body to get the analysis information and add it to the CosmosDB via our IAsyncCollector. The function body is now modified to be as follows.
[FunctionName("BlobImageAnalysisFunction")]
public static async Task Run(
    [BlobTrigger("images/{name}", Connection = "blobDemoConnectionString")] CloudBlockBlob myBlob,
    [CosmosDB("rcBlobImageDB", "images", ConnectionStringSetting = "cosmosDBConnectionString")] IAsyncCollector analysisResults,
    string name, TraceWriter log)
{
    log.Info($"C# Blob trigger function Processed blob\n Name:{myBlob.Name} \n Size: {myBlob.Properties.Length} Bytes");

    string blobSas = GetBlobSharedAccessSignature(myBlob);
    string blobUrl = myBlob.Uri + blobSas;

    log.Info($"My Blob URL is: {blobUrl}");
    log.Info($"My Blob SAS is: {blobSas}");

    var imageAnalysis = await GetImageAnalysis(blobUrl);

    FaceAnalysis faceAnalysis = new FaceAnalysis
    {
        BlobName = myBlob.Name,
        Faces = imageAnalysis
    };

    await analysisResults.AddAsync(faceAnalysis);
}
Our blob trigger function is ready now. We mapped the BlobTrigger to our blob in Azure and created the needed SAS token for granting access. We also created the needed Face API in our Azure portal and wrote up the needed code to access this API and get the analysis information from it. Finally, we mapped our CosmosDB created in Azure portal to be used in our function and save the collection of analysis in our images collection.
Since everything is ready now, we still only have to push our function to Azure and run this function to check the results of any uploaded image to our images blob. To do, I will push the function code to my git repository in the function app that I already have in my Azure subscription. Note that we discussed in several posts before how to create a function app and push it to Azure, so you can refer to these posts for any help in this.
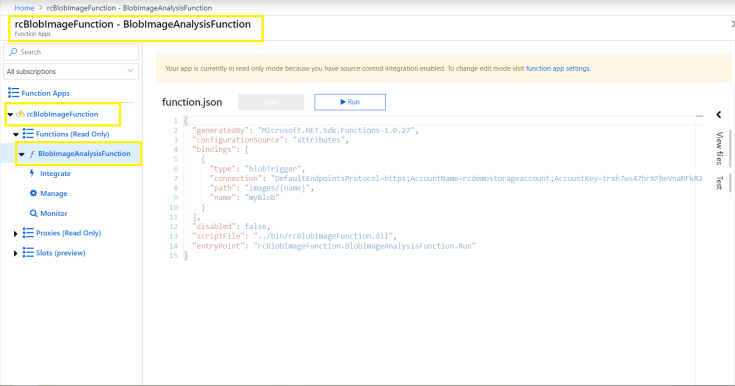
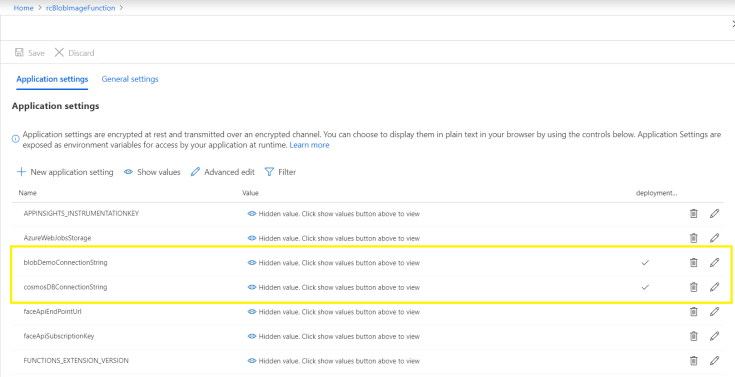
A very important note to keep up in mind, when we push our blob trigger function to the Azure portal, don’t forget to add all the keys we added to the local.settings.json file to configuration section of the Function App in Azure or the function will not be able to execute and run errors will occur. The function app that I have now in my Azure portal looks like below with the configuration keys also shown along with the application settings.
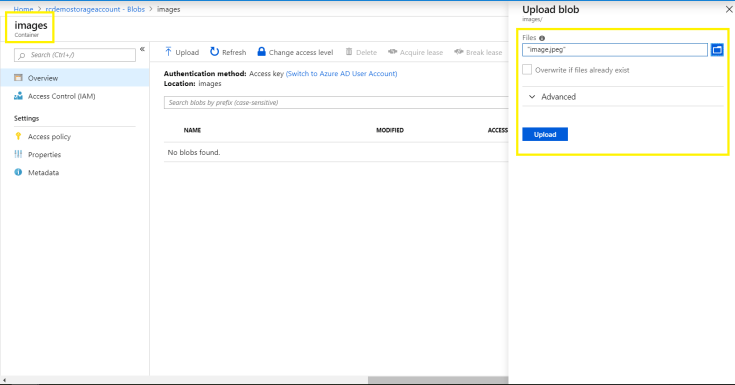
Action Time! Now my function app is up and running in Azure and the Face API we created before is also there. All what we have to do is to navigate to our images blob storage blade and upload a new image file from there and wait till we see the results saved in the CosmosDB. You can do a sample web application that access the blob and send the image into it but we will use the Azure portal directly for testing now.
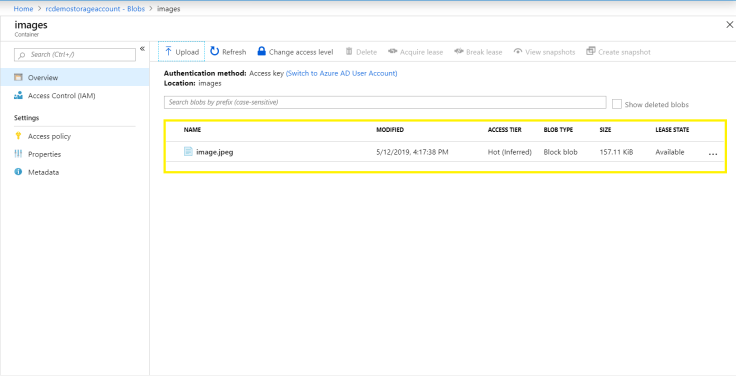
As mentioned, I navigated to the blob storage images folder path and uploaded a new image of mine there. Once the image is uploaded to the blob the function is triggered and all the analysis done was exported to the CosmosDB. The results and the actions are shown below.
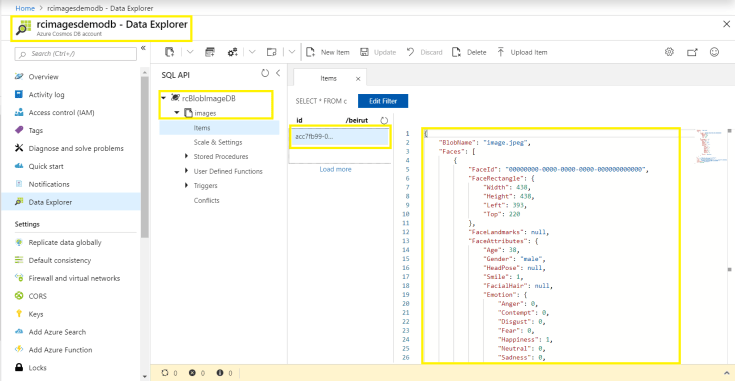
The results from the analysis are now available in our images collection in the CosmosDB. You can use this information for querying some fields needed for further analysis like the fields in the Emotions section. Results are shown below.
{
“BlobName”: “image.jpeg”,
“Faces”: [
{
“FaceId”: “00000000-0000-0000-0000-000000000000”,
“FaceRectangle”: {
“Width”: 438,
“Height”: 438,
“Left”: 393,
“Top”: 220
},
“FaceLandmarks”: null,
“FaceAttributes”: {
“Age”: 38,
“Gender”: “male”,
“HeadPose”: null,
“Smile”: 1,
“FacialHair”: null,
“Emotion”: {
“Anger”: 0,
“Contempt”: 0,
“Disgust”: 0,
“Fear”: 0,
“Happiness”: 1,
“Neutral”: 0,
“Sadness”: 0,
“Surprise”: 0
},
“Glasses”: “NoGlasses”
}
}
],
“id”: “acc7fb99-035e-4d32-a3be-97ed7b970277”,
“_rid”: “jTwvAK5+XfoCAAAAAAAAAA==”,
“_self”: “dbs/jTwvAA==/colls/jTwvAK5+Xfo=/docs/jTwvAK5+XfoCAAAAAAAAAA==/”,
“_etag”: “\”850093a1-0000-0e00-0000-5cd81d150000\””,
“_attachments”: “attachments/”,
“_ts”: 1557667093
}
In this post, we did something interesting where we used the powerful Cognitive Services features provided by Azure to analyze an uploaded image to a certain Blob. All this was done through our blob trigger function which accessed the blob to read the uploaded image, send the image to the Face API for analysis and export the results at the end into a CosmosDB. This was all achieved by using the power of Serverless Computing using Azure Functions!

Leave a comment