In the previous post, we discussed how to create Azure Functions in Visual Studio 2017 and in Azure Portal and we kept the VS Code part until later discussions. Today, we are going to start building our first function in Visual Studio Code from scratch by setting up the environment with Azure Functions Cli, authenticating your VS Code to sign in to Azure, and finally creating the function project and deploying on Azure.
Since we had already discussed Azure Functions and went deep in details about knowing this feature in Azure, we will head directly to building our first Azure Function in VS Code without further explanation. So, if you want to learn more about Azure Functions from the beginning, review the previous post before going forward through this article. Now, Let us get into action!
This post assumes that you already have an Azure account that is ready to be used, in addition to VS Code installed on your machine with the latest Node JS and NPM. If not you can create your own free trial account by subscribing to Azure portal.
Installing Azure Functions Cli & Extension in VS Code
The initial step to start with is to prepare the environment to start developing Azure Functions in VS Code. Therefore, we start by installing the Azure Functions Extension in VS Code. This can be done by opening VS Code, click on Extensions and search for “Azure”. In the search result, find “Azure Functions” item, click on it and in the right pane click on install. Check the figure below.

Since in my environment I already have the extension installed, it displays the options to either disable or uninstall. Once the extension in installed you will find an icon added to the left pane toolbar like the one displayed in the figure below.

When you click on this icon, a pane will be displayed that contains two options, either to sign in to azure with and existing account or creating a free azure account. Since I already have my azure account there, I will sign in with an existing account. If you do not have an account, you can check azure portal step-by-step guide to create a new free account in azure.

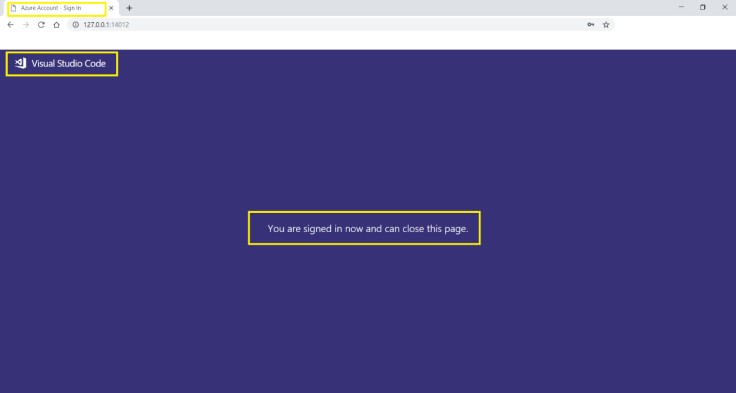
When you click on Sign in to Azure, a new browser will open to provide your sign in credentials. If login is successful, a page will be displayed indicating the authorization given to your VS Code on your local machine. The page should be something similar to the following (maybe the page changed by the time submitting this article).
After closing this page, you may need to restart VS Code for the changes to take place or reflect locally, especially if you are creating a new free azure account. The next step is to install the Azure Functions core tools globally on your machine. Notice that all what was mentioned earlier and will be mentioned later are done on a Windows 10 machine. If you are using any other OS like Linux or Mac or even you are working on a Windows server machine, the commands may differ and you have to search for the suitable ones. Once you restart or launch again VS Code and click on Azure Functions Extension icon, you should have something similar to the below.

To install the Azure Functions core tools and the Azure Functions Cli, you open a new command prompt with admin privileges or you can use PowerShell to execute the command below. In my case, I always prefer to use the Cmder Command Emulator. However, I will execute the installation command in a normal command prompt and after that check the results in the Cmder emulator.

When the installation finishes successfully, you will be notified about the installed Cli, packages and the installation path.

To check if Cli is working, all needed packages are installed successfully, and your machine is ready for starting developing Azure Functions over VS Code, open a powershell again or a terminal and execute the command “func” and you should have results as shown below.

Creating Azure Function App in VS Code
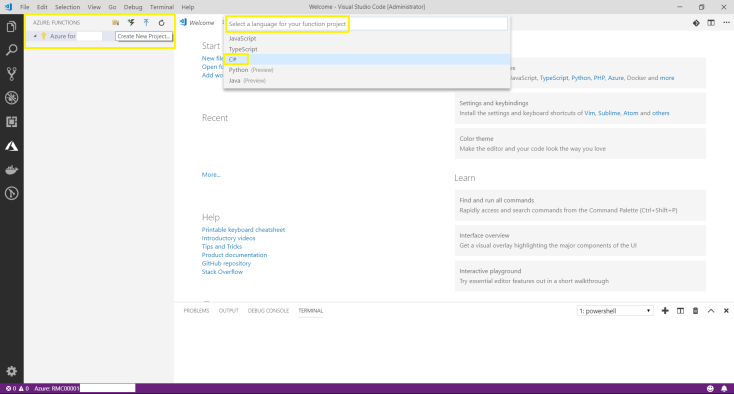
After the successful installation of the Azure Functions extension in VS Code and Cli on your machine with all the needed packages, now it’s time to create our first azure function app in VS Code. So, open VS Code instance, click on the Azure Functions extension icon in the left toolbar and create a new project. This will prompt you to select a folder path for your project. For me I already have a local repository for all my projects, you can select any path suitable for you. When you setup the folder path, you will be also prompted to select the preferred language to be used for developing the function app. In our case, we will be using C# as our development language for the function method.
Next, you will be asked which runtime you want to use. Here you have two options; you go for Version2, which is .NET Standard, or for Version1 which is .NET Framework. In our case, we will be using .NET Standard as our runtime for the function app being created.

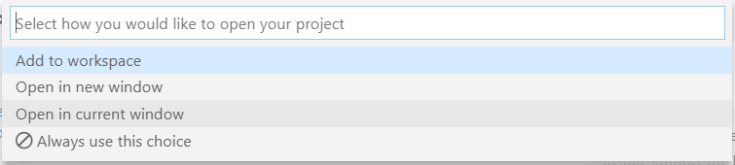
The next step is to choose where you want to open the project being created, and this depends on your choice. For me I will open it in the current window.
When the project finishes loading, head to the Azure Function explorer and create a new function. This will prompt you to select the solution folder or browse for a new location. We will of course select the current workspace folder we created our solution in it. Select the current directory your solution found in; it is the default option, and press Enter to proceed. This is shown in the figure below.

When you set the folder for the function app to be created, another prompt action will be displayed in order to set the type of the function app to be created. As we all know, the azure function app can be of several types like HttpTrigger, BlobTrigger, etc… (Check my previous post for more info). For our example we will create an HttpTrigger function app, so we select this option and proceed.

After setting the function app type, we have to name our function. You will be prompted to set the name of the function in the next displayed window. I will name my function as shown below.

The next step is to specify the namespace of your function. The default name is “Company.Function” but you can change it. After setting the namespace, press Enter to proceed.

Now we have to specify the access rights or what was known before as “Authorization Level” for the function app.

In our example, we will choose the Anonymous access rights. Select this option and press Enter, you will be moved directly to the project with the function app created in it. The created function app will look somehow like below.

The function looks similar to the one we created in Visual Studio 2017 in the previous post. The project is of the same structure and the function app is of the same code sample (check previous article for more information about the function code block input and output).
So, now we have our function app created, let us build it and run it locally!
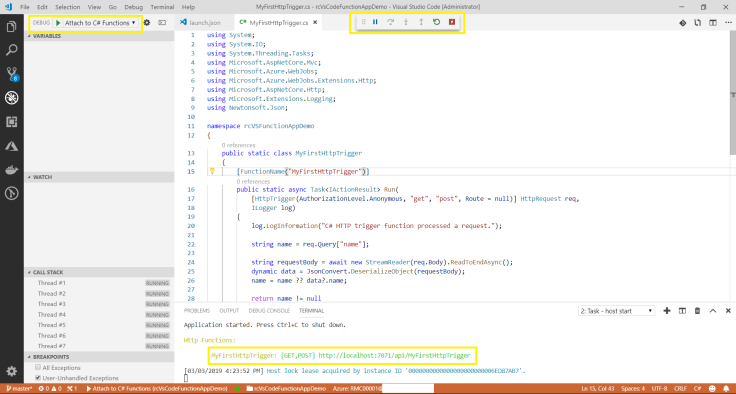
To run the function app, go to debugger in VS Code and click on the debug icon in the Activity Bar. This will open the debugging explorer where you can click on the green button to start the application. Note that there may be some missing packages that need to be installed so the application build may take some time to complete. Once the app starts, you should have something similar to the above figure.
The app build will generate a local URL for your function. Simply click on the highlighted link, it will open in the browser and it should return the message “Please pass a name on the query string or in the request body” since there is no variable “name” passed neither in the query string nor in the body request.

Now, append the URL in browser with the variable “name” in the query string and give it a value. A message will be returned containing this variable value as a response for the function call. In my example, I passed the message value “my first function app” to the variable “name” and I got the following result.

If you prefer using the Azure Function Cli instead of pressing F5 to start the function app, use the following command.
func host start
Notice in the terminal the traces that take place for what is happening during the execution of the call when we added the “name” variable value and pressed Enter.

Now, we have a working function that runs locally and does what is required, so it is time for deployment on Azure Functions!
Deploying to Azure Functions from VS Code
To deploy the function to azure we will go through several steps in VS Code, from specifying the new function app name to reaching the region of deployment in which data center. So let us get started!
To deploy the function you created in VS Code to Azure Functions, open the Azure Functions explorer in VS Code and click on the upload arrow, which is the Deploy to Function App arrow. You will be prompted to select an existing function app if any, if not create a new function app by clicking on “Create New Function App” and press Enter. The process is shown below.

By clicking on “Create New Function App”, you will be asked to enter a unique name for the function to be created. Provide a unique name for your function, and press Enter to proceed. I will set mine to “rcVsCodeFunctionAppDemo”.

Next step you will be asked to specify the resource group of your function app. As previous section, you have either to select an existing resource group in your azure subscription, or create a new one. In addition, we will go for the second option by creating a new resource group and press Enter as shown below. I will set my resource group name to the same value used before “rcVsCodeFunctionAppDemo”.

Next step is to set the storage account. In addition, we will create a new storage account instead of selecting an existing one. I provided the same name used above for the storage account also.

Last step is to set the location region of this new resource, where a list of available data centers in several countries is displayed. I usually select the data center that is nearest to the client’s region who will be using the created function app. Since, I am only using my function now; I will be selecting “France Central” as the target location.

When you select the region and press Enter, the upload process will be initiated and VS Code will display a series of messages for you to be informed about the deployment process.


Now, we head to azure portal to check our created function by going to the “Function Apps” blade. And the results should be similar to the below.

When you click on the function name, the azure platform will notify you that you cannot edit or modify this function since it is running from a package file. Therefore, the function will be set to read-only mode!

Now how about testing our function app that is running in the portal! Simply, click on the URL displayed in the Output area, and the new browser will open with a warning message to provide a name value since the “name” query string is missing. Provide the “name” query string and call the function again, and here we go the function app is working as was tested locally. Congrats!

In this post, we learned how to install and configure azure functions extension, Cli and tools in VS Code. Create a new function app and deployed it to Azure Function Apps. In the next posts, we will be discussing very interesting topics like analyzing an image using Azure Cognitive Services, saving data results to Cosmos DB and a lot more. Stay tuned!

Leave a comment